Static Sites
Whenever I try to get started on a personal project, I spend about 90 percent of the time looking up stuff on what tools to use and the remaining 10 percent goes to not working on the project.
I’ve wanted to work on a personal site for a while. This time I’m going to try out using jekyll. I had played around with pelican in the past, but there feels like too much of a learning curve to get started with all of the plugin hooks and configuration with getting your theme up and running. Something that really appeals to me about jekyll is how the fact that it doesn’t have any of those features means I have nothing additional to learn. Just another template language I can putz around with and go.
The only example of an engineer that I admire who uses pelican is eevee’s Fuzzy Notepad, and I couldn’t figure out how to setup their blog locally.
Comparing the two tools, pelican requires a lot of extra stuff you need to read about, and the templates require you plug in all these configuration variables all over the place. Maybe that makes it easier to swap between themes if you’re structuring your site in a way to source things dynamically, but then it requires you learn what those dynamic portions are. In jekyll it looks like you just do what you want right in the template. That feels way clearer to me.
Maybe I’ll be shooting myself in the foot using something like this, because it may make it harder to migrate to a new platform or a new visual theme, but for now getting started is more important than having something future-proof.
How to do your own site
The two big decisions you have to make are what static site generator to use and how you want to host your site.
For now I’m trying out Jekyll for generating the site, S3 for my host, and NearlyFreeSpeech for my domain/DNS.
Make the site
This isn’t a web development tutorial, so:
jekyll new mysite
cd mysite
jekyll serve
And look, open up your browser at http://127.0.0.1:4000/, you have a site!
Jekyll builds your site on every file change and saves your website to the
folder _site. These are what you’ll put on your web host so others can view
your stuff.
Setup web hosting
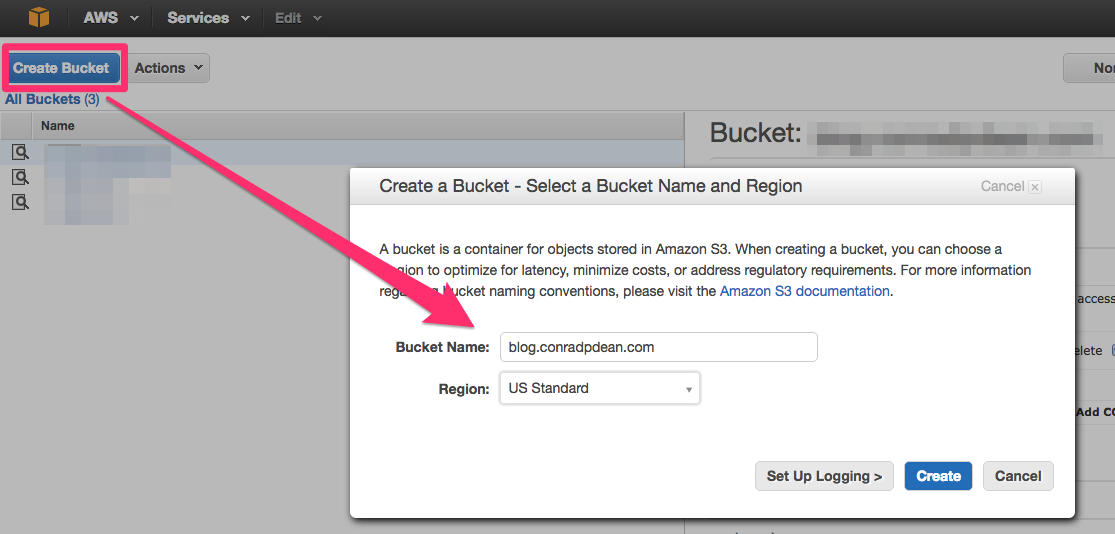
I have the domain name conradpdean.com, and I want to host my blog at blog.conradpdean.com, so in AWS that is the name of the bucket I need to make.
Setup Bucket Permissions
By default, S3 prevents everyone from being able to look at your stuff. That’s a nice, secure default in general, but you probably want other people to be able to look at your site. You’ll need to open up the bucket permissions by going through Properties -> Permissions -> Edit bucket policy
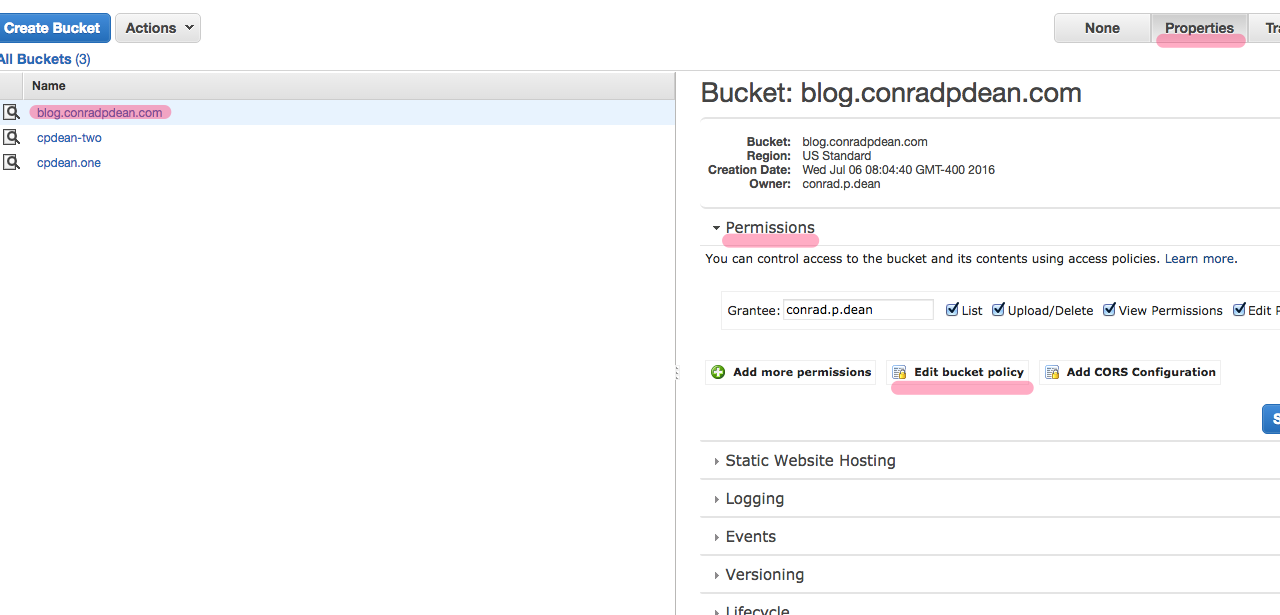
This will give you a text box to configure the permissions of your s3 bucket directly with a json document. Here’s what you do to enable read access to everyone on all files in the bucket:
{
    "Version": "2012-10-17",
    "Statement": [
        {
            "Sid": "PublicReadGetObject",
            "Effect": "Allow",
            "Principal": {
                "AWS": "*"
            },
            "Action": "s3:GetObject",
            "Resource": "arn:aws:s3:::blog.conradpdean.com/*"
        }
    ]
}
Change the bucket name from blog.conradpdean.com to the bucket name that you
chose instead.
Enable Web Hosting
On this screen you just have to enable website hosting. Click on the Static Web Hosting heading, enable that feature and configure it to use a couple of files for the default index page and the file to use for 404 errors.
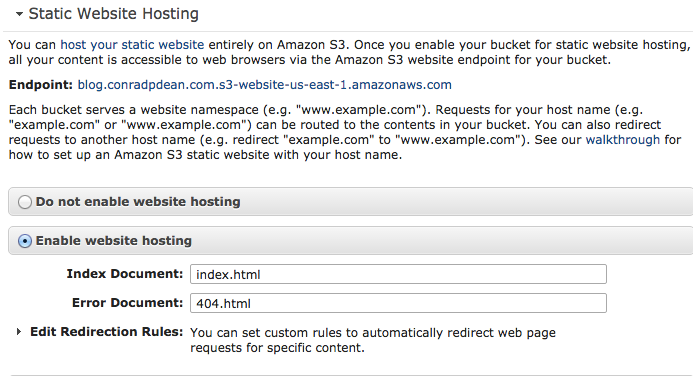
Notice that this dialog is telling us we can access our site at the endpoint blog.conradpdean.com.s3-website-us-east-1.amazonaws.com. This is the address we will use when pointing our domain name to S3 later.
Fix error-handling
We don’t currently have a 404.html page in our project, so let’s add one.
We need to make a page to show users when they go to the wrong url on our
static site. Make a file 404.html that has this in it:
---
layout: default
permalink: /404.html
---

<div class="home">

  <h1 class="page-heading">404 - Page not found</h1>
  <p>
      Sorry -- there aren't any pages with that address here.
  </p>

</div>
This is just plain old HTML with a YAML
frontmatter at the top. The frontmatter
is something you put at the top of every text file with some configuration
variables set that let Jekyll know what to do with it when your site is
generated. The variable layout is set to default, meaning Jekyll should use
the file _layouts/default.html to render this file. Using layout files like
this make sure that every page in your site has a consistent cohesive look, and
also it helps you from needing to duplicate common parts of your site
everywhere like the headers and footers. The permalink variable is set to
/404.html, meaning Jekyll should save the generated 404 page to the root of
your generated site with the name 404.html. This is what we’ve told S3 to
use as the error document, and in other web hosts like Github Pages and Gitlab
Pages the file with this name is used by default through their conventions.
Publish Your Site
I just have a script in my project that builds and publishes my site all at once. You’ll need to install awscli to use it:
pip install awscli
aws configure
And my script looks like this:
jekyll build -d _published_site
aws s3 sync _published_site s3://blog.conradpdean.com/
It tells Jekyll to build the site and save the generated output to the folder
_published_site and then synchronizes that folder with my s3 bucket.
Jekyll automatically clears out the destination folder on every build to make sure old files not overwritten do not make their way into the published site.
Setup Your Domain Name
Now all that’s left is to configure your domain to point to S3. Every domain
hosting service is different, but look for how you can add DNS records. Add a
CNAME record to point the subdomain you’ve chosen to the public address to
your bucket. The public address can be found in the dialog we used to enable
static web hosting above, but the address will be in the format of:
<BUCKET NAME>.s3-website-<AWS REGION NAME>.amazonaws.com
For me, because the name of my bucket is blog.conradpdean.com and I picked
the US standard region, the endpoint is:
blog.conradpdean.com.s3-website-us-east-1.amazonaws.com
Once you add the CNAME DNS record to point to this name, you should be able
to view your site!
What Now?
S3 is fine as a cheap web host, but it comes with some limitations. For one, there is a monthly cap of 20 thousand GET requests. This means if you have a blog post that needs 10 files (the page, css files, images, font files, etc) then you could only serve the page two thousand times before needing to pay for the bandwidth. Also, your site will only be served from a single region, so users outside of that region will experience slower page loads.
To fix that problem, setup a CDN like cloudfront or cloudflare to reduce the strain on your AWS usage.
Additionally, you should setup SSL so your reader’s privacy is maintained.
Both setting up a CDN and SSL are covered here.